
Project 1: Instructional Video
In my film class, we were tasked with creating a 1 minute long instructional video that teaches or explains a process. I decided I wanted to visually explain how to load and unload a film camera (specifically my Nikon F-601 film camera) as I believe it has communicative value. I recently started loving film photography and I feel as though this video would be helpful for those who are new to film as it has recently become popular again. I wanted the video to have a calming mood and for it to feel less like an instructional step-by-step video, but rather like you are simply watching and following someone as they change the film in their film camera.
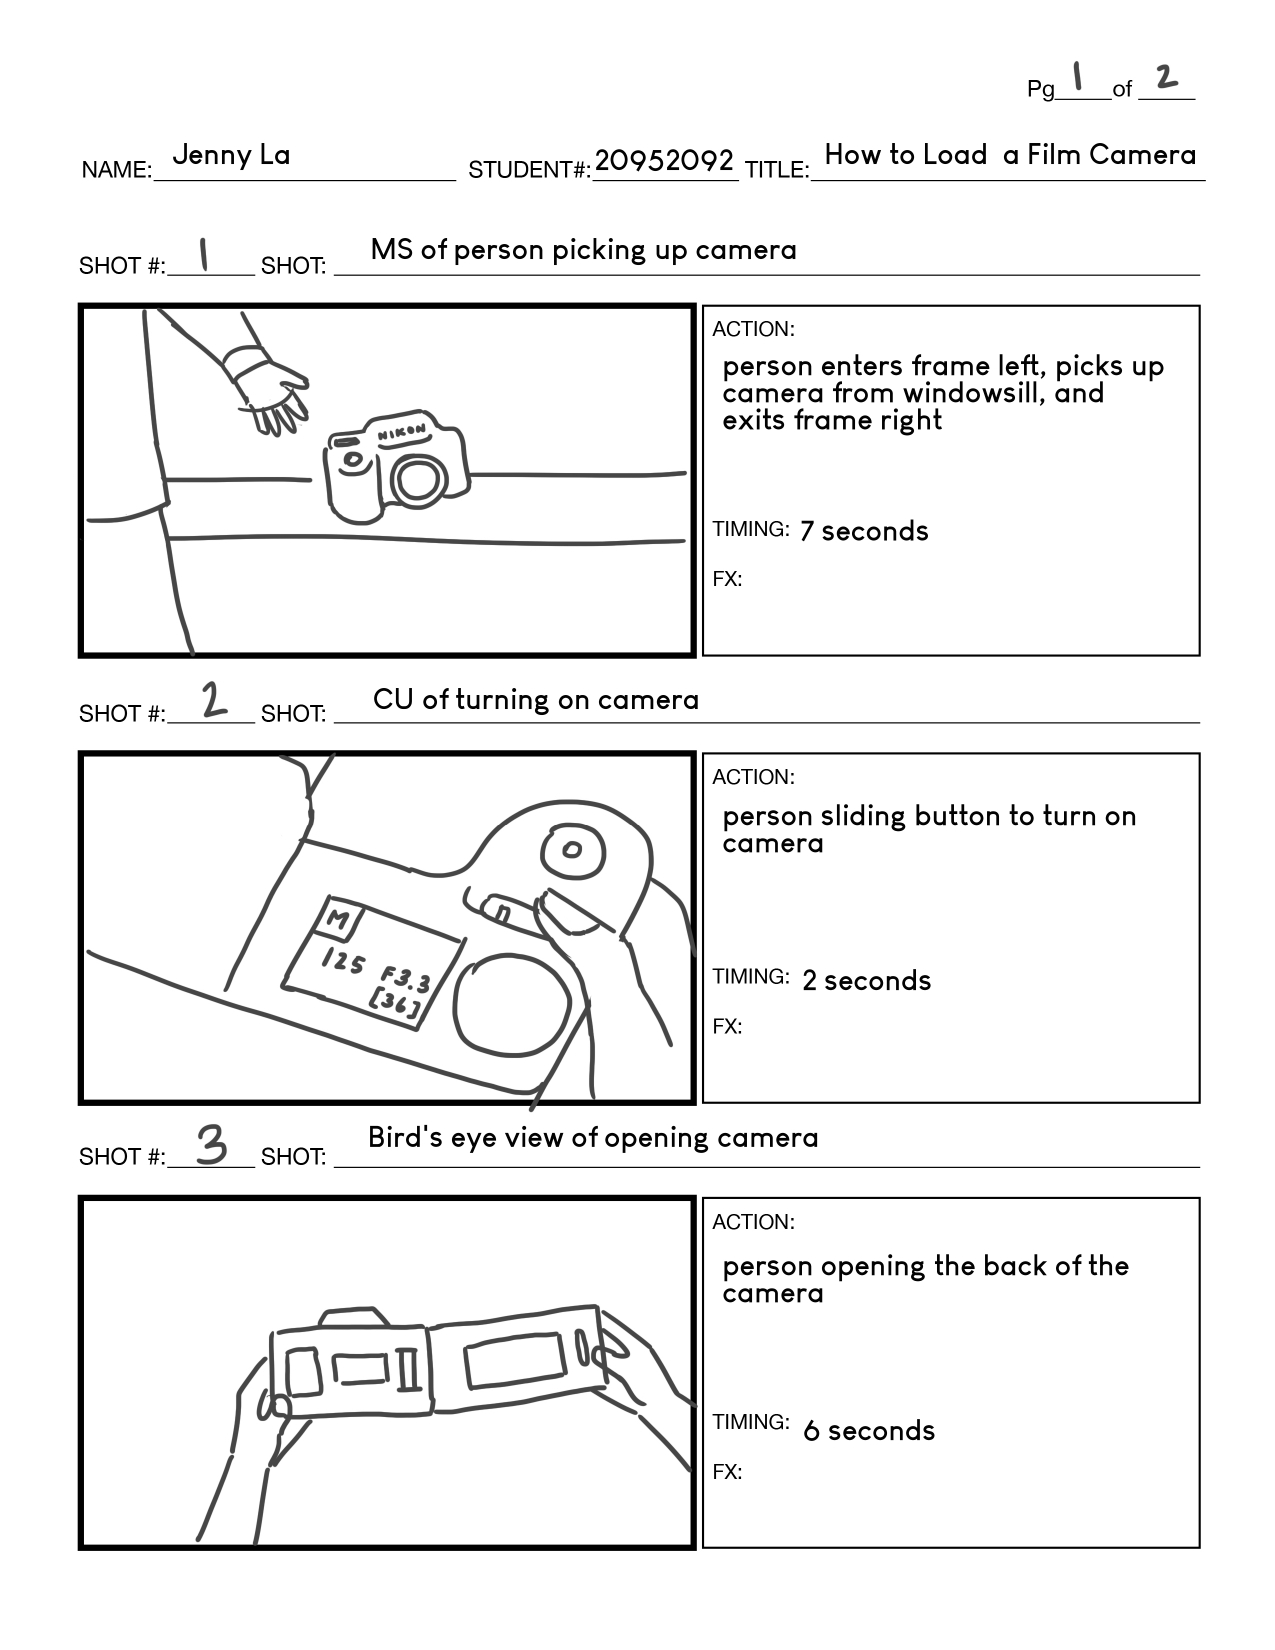
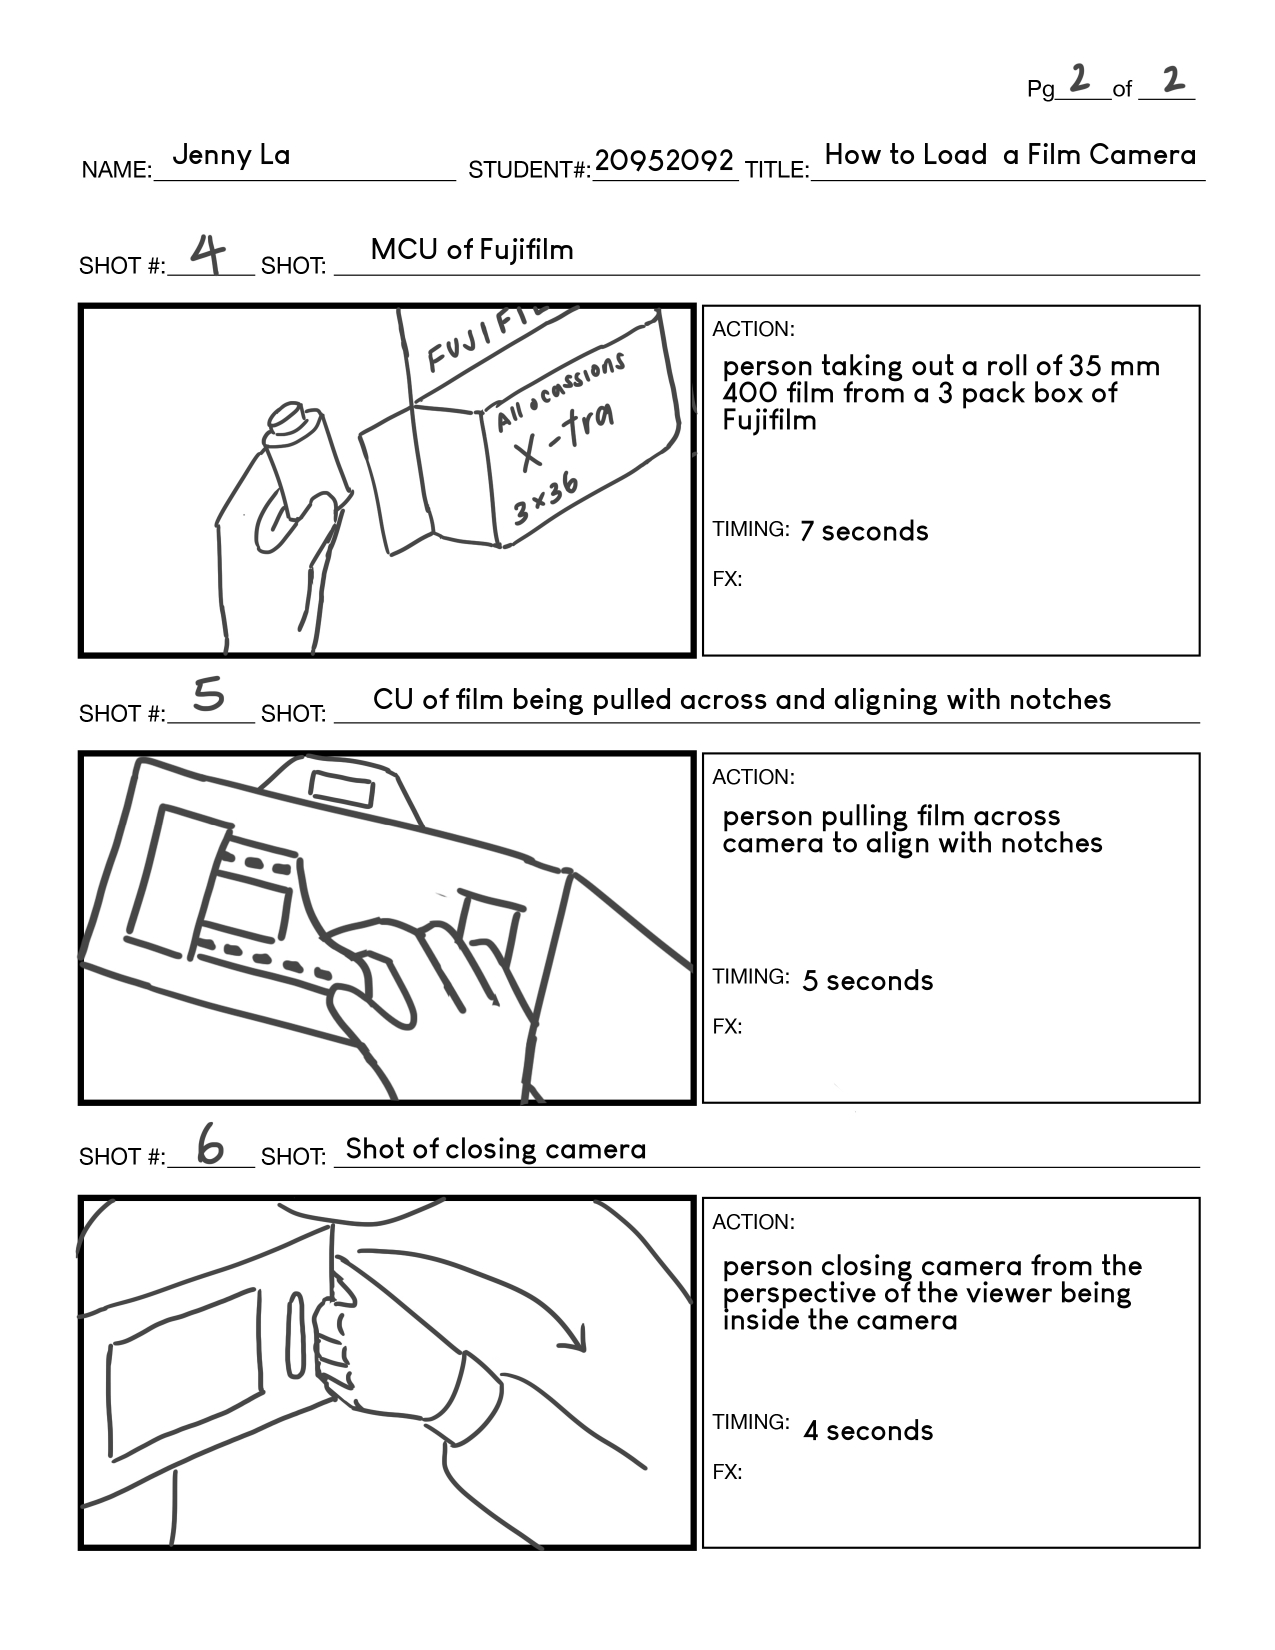
Prior to shooting, I prepared a treatment and production plan to effectively visualize and guide my production. I drew out a storyboard to envision my different shots and I figured out how I wanted to frame my shots. I also planned out how long each shot will last to ensure that I have enough clips to fit within a minute, and I created a shot list for me to refer back to when I’m filming to make sure that I remember everything. I also prepared a prop, location, and equipment list, as well as a schedule to make sure I stay on track.
I chose to film myself for this video as none of my friends do film photography and this was challenging at times as all my shots were stationed on a tripod. It took a lot longer to film as I had to film some of the shots multiple times. Additionally, natural lighting was a struggle as clouds kept passing by and the lighting kept changing. I also only had a few hours to film before sunset. Therefore, some of my shots came out overexposed, but I edited it in post-production by bringing down the highlights and whites. Additionally, some of the actions done in the video could only be done once (eg. pressing the rewind button and pulling the new film across the camera) and so it was very stressful as I only had one chance to get the perfect shot. Although I encountered challenges and obstacles, I was able to work through them and find solutions.
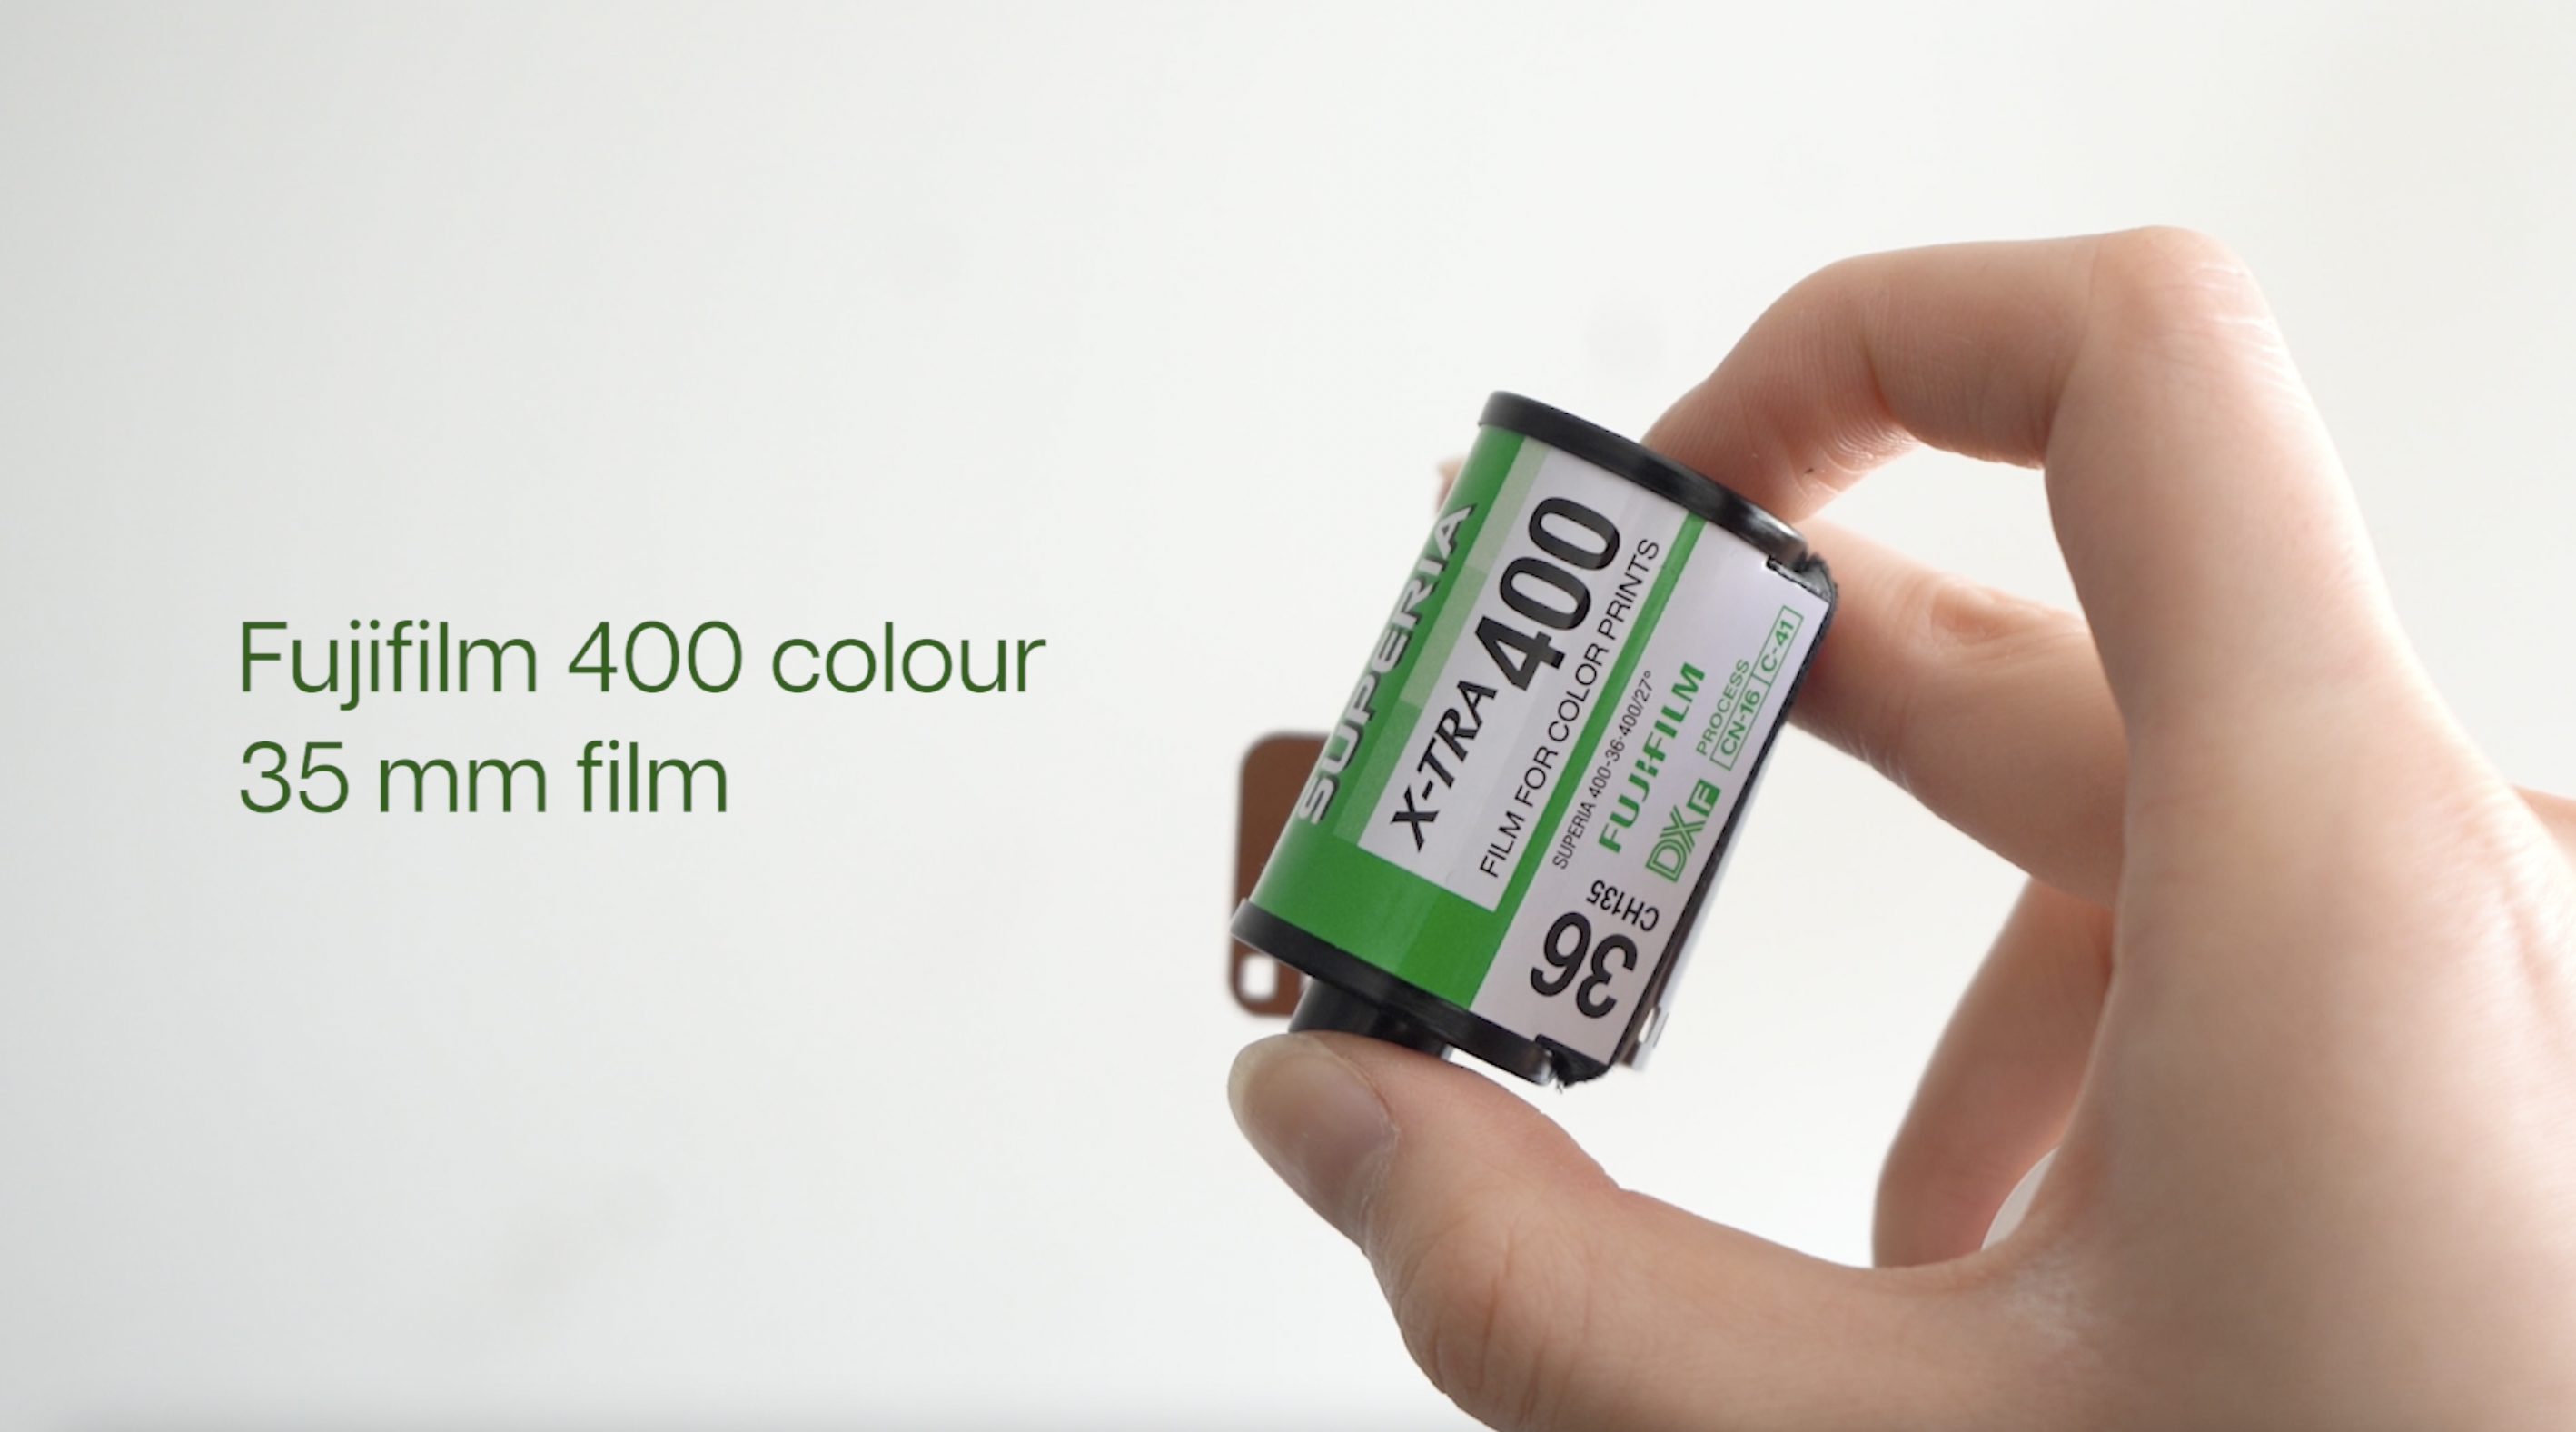
As for style, I researched videos on YouTube to gain inspiration and I wanted to imitate a film-y look for my video as well. Thus, I used a Fujifilm filter on Premiere Pro that made my video look faded. I also found a font that was rounder and one that felt friendlier. I wanted to film a variety of shots to make it visually interesting and I tried to get creative by having a shot seem like it was taken from inside the camera as the back of the camera closes. I wanted to use natural lighting so that the video felt less staged and less studio-like. I planned ahead and checked the weather to find the sunniest day I could shoot my video.
I submitted a roughcut of my video and was given feedback by my professor on ways to improve. Some of my shots were too quick and my word placement was off as it draws your eyes from left to right. Some of my terminology and terms in my instructions were slightly incorrect as well. After receiving the feedback, I either centered the text or placed it closer to the point of illustrative focus and I gave more time for the viewer to see and register the objects in the video. I also corrected the wording of my instructions.
For this project, I used a tripod and a Sony A7 III camera to film and I edited my video on Adobe Premiere Pro. All the shots were filmed by myself in my bedroom by my window during the day. I switched between manual and automatic focus for different shots and I changed my ISO various times to accommodate for the change in natural lighting.
Through this project, I learned to be more proficient in Premiere Pro and a specific feature I learned was how to create freeze frames. I also think I am now better at visualizing and naming my shots before I start filming. I really enjoyed editing this video and putting everything together. I liked searching for fonts and going through the various built-in film filters that Premiere Pro has. I believe that I provided clear instructions in this tutorial while also making it visually appealing. I think my shots were framed well and I was able to have a variety of shots with different camera angles that made the video engaging. I’m happy I got to focus this project on something I love and was able to teach someone a process I find interesting.